
Appliance Categories
Select a Product
What type of hob is the PE29HL-2?


It is a built-in electric ceramic hob with streamlined design, LED indicators, and 2 cooking zones.
What should I do if the hob does not turn on?
Check that the power plug is connected; Verify household fuse or breaker; Ensure cookware is suitable and properly placed.
What should I do if the ignition is not creating a spark?
Check that the ignition is clean and not wet. The hob requires a battery and needs to be replaced every 12-24 months and is recommended a certified technition undertake battery replacement.
Why does the flame on my gas hob look irregular?
This can happen if the burner cap or trivet is not positioned correctly, or if the burner parts are dirty or blocked
What should I do if I smell gas?
Maintain ventilation to allow gas to dissapate, then extinguish all naked flame if possible and turn off gas control valve. Finally keep away from affecred area and contact service support or Towngas emeergency hotline.
Why is the ignition clicking but the burner won’t light?
The battery may be weak, even if clicking is heard.
Gas may not be reaching the burner — check the supply.
Burner holes may be blocked and need cleaning.
Why does the flame go out suddenly?
Strong airflow or drafts may extinguish the flame.
The gas supply may be unstable or interrupted.
Ensure cookware is not too large, which can smother the flame.
Any precaution required before use?
Keep kitchen or cooking area ventilated and tuen on exhaust fan to ensure fumes and harmful substances are extracted.
Why is the hob making a “Beep” sound?
This alarm indicates improper use, such as unsuitable cookware or unstable voltage.
Why does the hob shut down when multiple zones are used?
The hob has a 30A maximum current limit.
Using all zones at high power may trigger automatic balancing or shut-off.
Why is one cooking zone not heating properly?
Voltage supply may be unstable, or cookware may not be induction-compatible.
What does Error Code “E4” mean?
Cause: Sensor malfunction or internal communication error.
Solution: Disconnect power for a few minutes and restart. If error persists, contact service support.
Why do I smell gas when the hob is off?
Check that all knobs are fully turned to “OFF.” Inspect the gas connection for leaks. If the smell persists, shut off the supply immediately and contact service support.
How do I clean the hob?
Use a soft cloth with mild detergent. Avoid abrasive cleaners. Regularly clean burner parts to prevent blockages.
Why is the rear zone weaker than the front zone?
The rear zone is designed for 1200W lower-power cooking, while the front zone delivers up to 2800W for rapid heating.
Can it be installed as built-in or freestanding?
Yes. It supports both built-in installation and countertop use.
What should I do before first use of the CRISTAL C‑S55GXH steam oven?
Important information before first use: Clean the oven cavity with a soft cloth. Fill the water tank with clean water. Run the oven empty on steam mode for 10 minutes to remove any residual manufacturing odors.
How should I clean and maintain the CRISTAL C-S55GXH?
After each use, wipe the interior with a soft cloth to remove food residue. Regularly descale the steam system according to the manual’s instructions to prevent mineral buildup. Keep the door seals clean to maintain efficiency and safety.
Why is there no steam coming out during cooking?
Check that the water tank is filled and correctly inserted. Ensure the steam function has been selected. If the problem persists, descale the appliance as instructed in the manual.
Why does the oven display an error code or stop mid‑program?
This may occur if the water tank is empty or incorrectly positioned. Refill and reinsert the tank. If the error continues, switch off the appliance, wait a few minutes, and restart. Contact customer service if the fault persists
Why does the oven door not open immediately after cooking?
For safety, the door remains locked until the oven cavity has cooled to a safe temperature. Wait until the lock indicator switches off before attempting to open the door.
What should I do if the oven produces excessive condensation?
Condensation is normal during steam cooking. Wipe the door and cavity dry after use. Ensure the oven is well‑ventilated and avoid leaving food inside after cooking.
How do I descale the steam system?
Regular descaling is required to prevent mineral buildup. Follow the descaling program in the manual using only the recommended solution. Do not use vinegar or other cleaners, as these may damage the appliance.
What is the “Multiple Cooking Stages” function on the C‑S68GXMB‑1?
It lets you program several cooking phases in sequence (e.g., steam → bake → grill). The oven automatically switches modes, temperatures, and times without interruption.
What should I do if smoke is emitted during cooking?
Switch off or unplug the appliance immediately and keep the door closed to stifle any flames.
Which utensils are safe to use in the microwave?
Only use utensils that are suitable for use in microwave ovens. Avoid metal containers or dishes with metallic trim.
How do I clean the microwave cavity and accessories?
Always unplug the appliance before cleaning. Wipe the cavity with a soft damp cloth. Do not use abrasive cleaners. Accessories such as the grill tray and turntable can be washed with mild detergent and water.
What should I do if the oven does not start when pressing ‘Start’?
Check that the door is fully closed. The oven will not operate if the door is ajar. Also ensure that the correct function and time have been set.
Why does the turntable not rotate during cooking?
Check that the turntable and roller ring are correctly positioned. Ensure no oversized dish is blocking rotation. If the issue persists, contact customer service.
How do I use the combination cooking mode (microwave + grill)?
Select the combination function on the control panel. Place food on the grill rack provided, and avoid using plastic containers. This mode combines microwave heating with grilling for crispier results.
How do I use the rotisserie function?
Insert the rotisserie spit according to the manual’s instructions, ensuring it is balanced. Select the rotisserie mode on the control panel. Always use the drip tray underneath to collect juices.
Why does the fan continue running after cooking has finished?
This is normal. The cooling fan runs automatically to lower the oven’s internal temperature and protect electronic components. It will stop once the oven has cooled sufficiently.
How do I use the rapid preheat function?
Select the rapid preheat mode to bring the oven to cooking temperature faster. This is ideal when you want to save time before baking or roasting.
Why does the oven emit a humming sound during operation?
This is the sound of the cooling fan and convection system. It is normal and ensures proper air circulation and protection of electronic components.
What should I do if the hood makes unusual noise or vibration?
Check that the installation is secure and ducting is not obstructed. If noise persists, contact an authorized service technician.
What should I avoid doing under the cooker hood?
Do not flambé, leave naked flames, or leave frying pans unattended. Overheated fats or oils may catch fire, and flames can damage the hood.
Why does the hood continue running after I switch it off?
This is normal. The hood’s fan may continue briefly to clear residual smoke and protect the motor. It will stop automatically.
Can I use the hood in recirculation mode?
Yes. For recirculation, install the optional charcoal filter. Replace the charcoal filter periodically to maintain performance.
What is the electric heat auto‑clean function?
This feature uses built‑in heating to dissolve accumulated oil inside the hood, reducing manual cleaning and maintaining suction efficiency. Activate it periodically as recommended in the manual.
How do I use the motion sensor control?
The C9035EB‑2 supports gesture control. Simply wave your hand in front of the sensor to switch the hood on or off, or to adjust fan speed. This avoids touching the panel with greasy hands during cooking.
What is the electric degreasing function?
This feature uses heat to dissolve accumulated oil inside the hood, reducing manual cleaning and maintaining suction efficiency. Activate it periodically as recommended in the manual.
Can I use induction control or manual sensor switch?
Yes. The C1803ASS supports induction control and manual sensor switching, allowing you to operate the hood hands‑free or via touch panel.
Can I use the hood without grease filters?
No. The hood must never be operated without grease filters or with excessively greasy filters, as this creates a fire hazard and reduces efficiency.
How do I clean and maintain the hood?
Remove grease filters and wash them regularly with warm water and mild detergent. They are dishwasher‑safe. Replace charcoal filters periodically if using recirculation mode. Never use abrasive cleaners.
What should I do if suction seems weak?
Check that the filters are clean and properly installed. Ensure ducting has no sharp bends or obstructions. If using recirculation mode, replace the carbon filter when saturated.
How do I clean the aluminum grease filters?
Remove the washable aluminum filters and clean them regularly with warm water and mild detergent. They are dishwasher‑safe. Ensure they are completely dry before reinstalling.
Can I adjust the telescopic panel while the hood is running?
Yes. You can slide the panel in or out during operation. Pulling it out increases the extraction area, while pushing it back reduces airflow.
How often should I replace the charcoal filter in recirculation mode?
Replace the charcoal filter every 3–6 months depending on cooking frequency. A saturated filter reduces suction efficiency.
How do I operate the telescopic design?
Pull out the telescopic front panel to activate the hood. Push it back when not in use to save space and maintain a sleek kitchen look.
How powerful is the suction on the T600GT hood?
The hood delivers up to 1000 m³/hr airflow, making it suitable for heavy cooking environments.
How do I operate the push‑button controls?
The T90ES uses simple push‑button switches for fan speeds and lighting. Press the relevant button to select low, medium, or high speed, and another to activate the integrated light.
What should I check if the hood does not start?
Confirm that the telescopic panel is fully extended, the power supply is connected, and the fuse has not tripped. If the hood still does not start, contact service support.
Why does the hood produce condensation during cooking?
Condensation may occur when cooking with high humidity. This is normal. Wipe the surfaces dry after use to prevent streaks or water marks.
Can the T60ES be installed in ducting or recirculation mode?
Yes. The hood supports both ducting (venting outdoors) and recirculation (using optional carbon filters). For recirculation, install the carbon filter and replace it periodically.
Is the heating powerful enough for a large bathroom during winter?
Yes. The DM168-1 features a 2000W high-power heater that provides rapid warmth. Unlike window models, its ceiling-mounted design allows for 360° airflow, ensuring the entire bathroom warms up evenly. It also includes a 10W LED light, making it a complete all-in-one replacement for your existing bathroom light and fan.
Why does the unit stop heating and the fan run at high speed after 30 minutes?
This is likely the Auto‑Cooling Safety Feature. After heating mode (2000W) runs for a while, the unit switches to high‑speed ventilation to cool the elements and prevent overheating. If it happens too soon, check the air inlet filter—dust buildup can restrict airflow, raise internal temperature, and trigger the safety shut‑off.
Since it extracts water, where does the moisture go?
Unlike portable dehumidifiers, the DM230R-1 requires a permanent drain pipe connection. It is designed to be plumbed directly into your bathroom's drainage system (pipe diameter should not exceed 25.4mm). This allows for continuous operation without ever needing to empty a water tank.
The unit is running, but the humidity level isn’t dropping. What is wrong?
This model uses a compressor, so first check if the drainage pipe is clogged. If water can’t flow through the drain line (due to a kink or blockage), the internal sensor will stop dehumidification to prevent leaks. Also, make sure the humidistat is set lower than the current room humidity—otherwise, the compressor won’t switch on.
I cannot connect my CB12 to the mobile app. What is the most common cause?
This is usually a signal or frequency issue. The CB12 Wi‑Fi module works only on 2.4GHz, so if your router is set to 5GHz, the connection will fail. Make sure your phone is on the 2.4GHz band during pairing. If the device still isn’t detected, check that it isn’t placed too deep inside dense cabinetry, which can block signals. In some cases, adding a Wi‑Fi extender near the vanity may help.
What kind of installation is required for this model?
The CB12 is an Embedded Installation model. It is designed to be built directly into wooden cabinetry or vanity units to save surface space. For a flush fit, your contractor will need to accommodate its dimensions: 318W x 148.1D x 706.2H (mm).
Why do I see moisture or “sweating” on the interior walls of my CB14?
Condensation can occur with direct‑cooling systems if the door is opened often in a humid bathroom or if the seal isn’t tight. Check the magnetic gasket for dirt or skincare residue that may break the vacuum. If the seal is clean, make sure the cabinet isn’t overcrowded—blocked airflow prevents the gentle chill from reaching the sensor, causing over‑cooling and moisture buildup.
How does the cooling system differ from a regular mini-fridge?
Standard mini-fridges are often too cold for skincare, which can cause products to separate. The CB14 uses a 50W intelligent thermostat specifically calibrated for cosmetics. It provides a "gentle" chill that maintains product consistency without the risk of freezing or condensation buildup.
Why does the “Di” alarm sound multiple times, and the machine stops working?
According to the D40DSS‑1 manual, this alarm usually means the Door Open Protection has been triggered. If the drawer isn’t fully closed or the magnetic seal is blocked by a plate, the UV and ozone functions will shut off for safety. Make sure tableware is stacked upright and away from the edges. If the drawer is closed but the alarm continues, check whether the limit switch at the back is properly engaged by the drawer frame.
Can I use it for plastic or delicate baby bottles?
Yes, but with care. The unit uses PTC internal recycling hot air with a drying temperature between 50°C and 75°C. This is generally safe for high-quality BPA-free plastics, but you should check that your specific items are heat-resistant up to 75°C. For maximum protection, place delicate items on the lower racks away from the primary heating element.
What makes the “Cyclone Spray Arm” better than standard arms?
The DD600-2 features a reverse double-layer blade design with micro-geometric nozzles. This creates a high-pressure "cyclone" effect that hits dishes from multiple angles. Technically, this allows the machine to dissolve stubborn grease and rice starch without requiring excessive detergent, even on the Rapid or Eco programs.
Why are there food particles left on the dishes even after a “Smart Wash” cycle?
This is often caused by a blockage in the Cyclone Spray Arm. Since the DD600‑2 uses fine nozzles to create high pressure, even a small seed or piece of debris can clog one and leave a blind spot in the wash.
What are the installation requirements for the flip-down mechanism?
The C-KTV 102 is designed for under-cabinet mounting. It requires a stable wooden cabinet base that can support the unit's weight. It features a 360-degree swivel and a tilt mechanism; technically, you should ensure there is at least 10mm of clearance between the top of the unit and the cabinet to prevent heat buildup during extended use.
Why is the TV remote unresponsive even though the screen is on?
Since this is a kitchen unit, grease or steam can build up on the IR sensor window. Wipe it gently with a damp microfiber cloth. If the TV is under strong LED cabinet lights, the “light noise” may interfere with the remote—try dimming the lights to improve responsiveness.
I can see a picture, but there is no sound coming from the unit. What should I do?
First, check if the “Mute” function is on. If not, review the audio settings in the menu. For external ceiling speakers, make sure the wires at the back of the TV are secure. If using the internal vibration speakers, confirm the TV is firmly mounted—loose brackets can weaken sound conduction.
Can this TV be recessed into the wall for a flush finish?
Yes. It comes with a recessed back-box for "in-wall" installation. To ensure the IP66 seal is maintained, your contractor must use the provided waterproof sealant/gasket around the edges of the frame. This creates a completely flush, sleek look that prevents water from leaking into the wall cavity behind the TV.
Will the mirror fog up while I’m taking a hot bath?
No. A key technical feature of the BKW215 is its built-in demister/defogger pad. This internal heating element gently warms the glass surface to slightly above room temperature, preventing condensation from forming. This ensures you have a clear mirror reflection and a clear TV picture even in the steamiest bathroom conditions.
The Smart Mirror is connected to Wi-Fi, but the apps are loading very slowly. How can I fix this?
Bathroom walls made of tile, stone, or concrete can block Wi‑Fi signals, and the mirror coating may add slight shielding. If your router is in another room, consider a Wi‑Fi extender closer to the bathroom. Also, update the internal software via the settings menu to improve app performance.
Why are my clothes still damp even after a long drying cycle?
This is often due to overloading. The Steam model dries up to 5kg, less than its 8kg wash capacity. If the drum is too full, air and steam can’t circulate, leaving clothes damp. Also, make sure the cold water supply is on during drying—these machines use a water‑cooled condenser, and without water they can’t remove moisture.
Does the steam function require a special plumbing connection?
No. The WD1460FMW-1 generates steam using the standard cold-water intake. The internal heater flash-heats a small amount of water to create a high-temperature vapor. As a technical tip: Ensure your water pressure is between 0.05MPa and 1MPa to ensure the steam generator functions at peak efficiency.
How does this machine prevent my clothes from shrinking during the drying phase?
This model uses intelligent sensors that monitor the moisture levels in the drum. Instead of just running on a timer, the machine stops once the clothes reach the desired dryness level (e.g., Cupboard Dry or Iron Dry), preventing over-drying and heat damage.
The machine is “walking” or vibrating excessively during the spin cycle. How do I fix this?
First, check that the transit bolts (3–4 large bolts at the rear) were removed during installation. If they’re out, the issue is likely an unbalanced load. Washing a single heavy item (like a bath mat or jacket) may stop the machine from reaching 1400 RPM to protect the bearings. Add a few towels to balance the weight, and ensure the adjustable feet are locked against a level floor.
Why is “No-Frost” technology important in an under-counter freezer?
In built-in units, manual defrosting is difficult because there is nowhere for the water to drain. The FR95-1’s No-Frost system uses a fan to circulate air, preventing ice buildup entirely. This means your drawers will never get stuck, and you’ll always have the full 83L of storage available
Why is the freezer alarm sounding or the “High Temp” indicator flashing?
This usually means the internal temperature is too high. Check if the door was left ajar or if warm food was added. Make sure the door seal is clean and tight. If the door is closed, confirm the ventilation at the base isn’t blocked, as restricted airflow can strain the compressor.
How does this model differ from the standard BV135EW?
Unlike the standard BV135EW which is a "larder" (all-fridge) model, the BV135EW-3 includes a compact internal freezer/ice compartment. While this slightly reduces the main fridge storage area, it adds the convenience of making ice and storing small frozen items without needing a separate freezer unit.
Why is there water pooling at the bottom of the fridge compartment?
This is often caused by a blocked drainage hole at the back of the fridge. During defrosting, moisture flows into a small drain, but if it’s clogged with debris, water will pool on the fridge floor. Use a pipe cleaner or the provided tool to clear the blockage.
Can this fridge be completely hidden behind my kitchen cabinet door?
Yes. The BV160EW is a fully integrated model, meaning your custom cabinetry door can be mounted directly onto the unit. This creates a seamless, "hidden" look in your kitchen while providing 111 liters of chilled storage.
Why is the fridge running continuously or making a loud humming noise?
Since this is a fully integrated model, continuous running often means poor ventilation inside the cabinetry. Check that the contractor followed the air‑path requirements, with airflow entering through the bottom plinth and exiting at the top. Without proper escape, heat builds up, forcing the compressor to run longer, which increases noise and energy use.
How is the door-on-door installation handled for this model?
This model uses a Sliding Hinge system. Your kitchen cabinet door is attached to the unit via sliding tracks, allowing the cabinet door to "glide" with the fridge door. This protects your kitchen hinges from the combined weight of both doors.
Why is there frost building up on the back wall of the refrigerator?
Small frost droplets are normal, but heavy buildup means items are touching the back wall. Keep food at least 1–2 inches away so moisture can drain properly instead of freezing onto containers.
The unit has power, but the cooling seems weak in both sections. What should I check?
First, check the control panel to see if “Holiday Mode” is on. As this is a Total No Frost unit, make sure tall bottles or boxes aren’t blocking the internal air vents—obstructions prevent cold air from circulating evenly.
What are the main internal features of the BS325EW-1?
This premium model is built for organization, featuring 3 adjustable glass shelves, 3 door balconies, and 2 crisper drawers for fresh produce. The freezer section includes 3 transparent drawers and a metal backplate for enhanced cooling stability and a Grade 1 energy rating.
Is such a large unit loud?
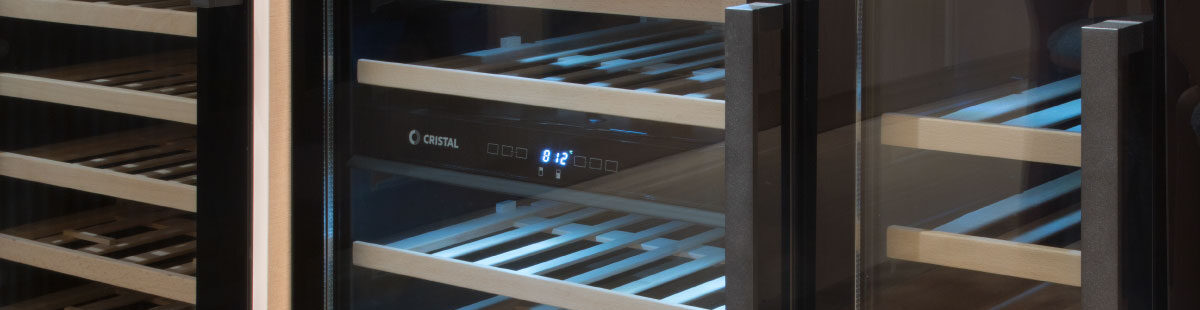
No. It is equipped with a "Library Quiet" anti-vibration system. This minimizes noise and, more importantly, prevents micro-vibrations from disturbing the sediment in your aging wines, which is vital for long-term maturation.
Why does the internal temperature seem to fluctuate or fail to reach the set level?
Yes, the CWB-123D-1 features a reversible door. This allows you to switch the hinge to either the left or right side to perfectly suit your room’s layout or to place two units side-by-side.
Can I store red and white wines at different temperatures?
Yes. Both the Upper and Lower zones can be independently set between 5°C and 20°C. This flexibility allows you to use either zone for long-term aging or for bringing specific varietals to serving temperature.
What should I do if I notice condensation (water droplets) on the glass door?
Mild condensation can occur if room humidity is high (above 70%) or the door is opened often. Make sure the door seal is clean and airtight. If it is, check that the Anti‑Condensation system is active by keeping at least 50 mm clearance from the wall for proper heat exchange.
Why is there a light layer of frost forming on the back wall of the unit?
Although the unit is Frost‑Free, frost can form if the door is left ajar or the temperature is set to 5 °C in a warm room. Make sure the door is fully closed and the seal isn’t blocked. The automatic defrost cycle will usually clear frost within 20–30 minutes once the door stays shut.
How does the “No-Frost” system protect my wine?
It maintains consistent humidity and prevents ice buildup. This keeps your wine labels dry and pristine while ensuring the beechwood shelves and corks stay at the ideal moisture level to prevent oxidation.
Will this slim model fit wider bottles like Champagne?
This model is precision-designed for 7 standard 750ml Bordeaux bottles. Its ultra-slim 148mm width is perfect for tight spaces, but it is not intended for wide Champagne or Burgundy bottles. For a mix of bottle sizes, we recommend our CWB-20S-1.
The unit is making a slight vibrating or humming noise; is this normal?
Because this is an ultra‑slim model, it’s sensitive to being unlevel. If you hear vibrations, check that the adjustable feet are firmly on the floor and the unit is perfectly level. Even a slight tilt can cause internal parts to touch the side walls, amplifying the motor’s natural sound.
What are the power ratings of each zone?
Left zone (ceramic): 2600W; Right zone (induction): 2800W
Why does the hob shut off after 60 seconds?
Check that the installation is secure and ducting is not obstructed. If noise persists, contact an authorized service technician.
Can I use a hood without external ducting?
Yes, many hoods offer recirculation mode with charcoal filters.
Do cooker hoods need regular filter replacement?
Yes, carbon filters should be replaced every 6–12 months, depending on cooking frequency.
How often should I run the oven’s self‑cleaning cycle?
Every 3–6 months, depending on usage.
What’s the difference between convection and conventional ovens?
Convection ovens use a fan to circulate heat, cooking food more evenly and quickly.
Can I install a gas hob without professional help?
No, gas hobs must be installed by a certified technician for safety compliance.
How do I clean a ceramic hob safely?
Use a soft cloth and non‑abrasive cleaner. Avoid steel wool or harsh chemicals.
Sorry! Result not found.